
Guide
Extensions
This page explains the two optional add-ons. It is for the WHMCS administrator. Each extension needs its own entitlement on the same license. If one extension is blocked, the core addon keeps working and that extension stays off.
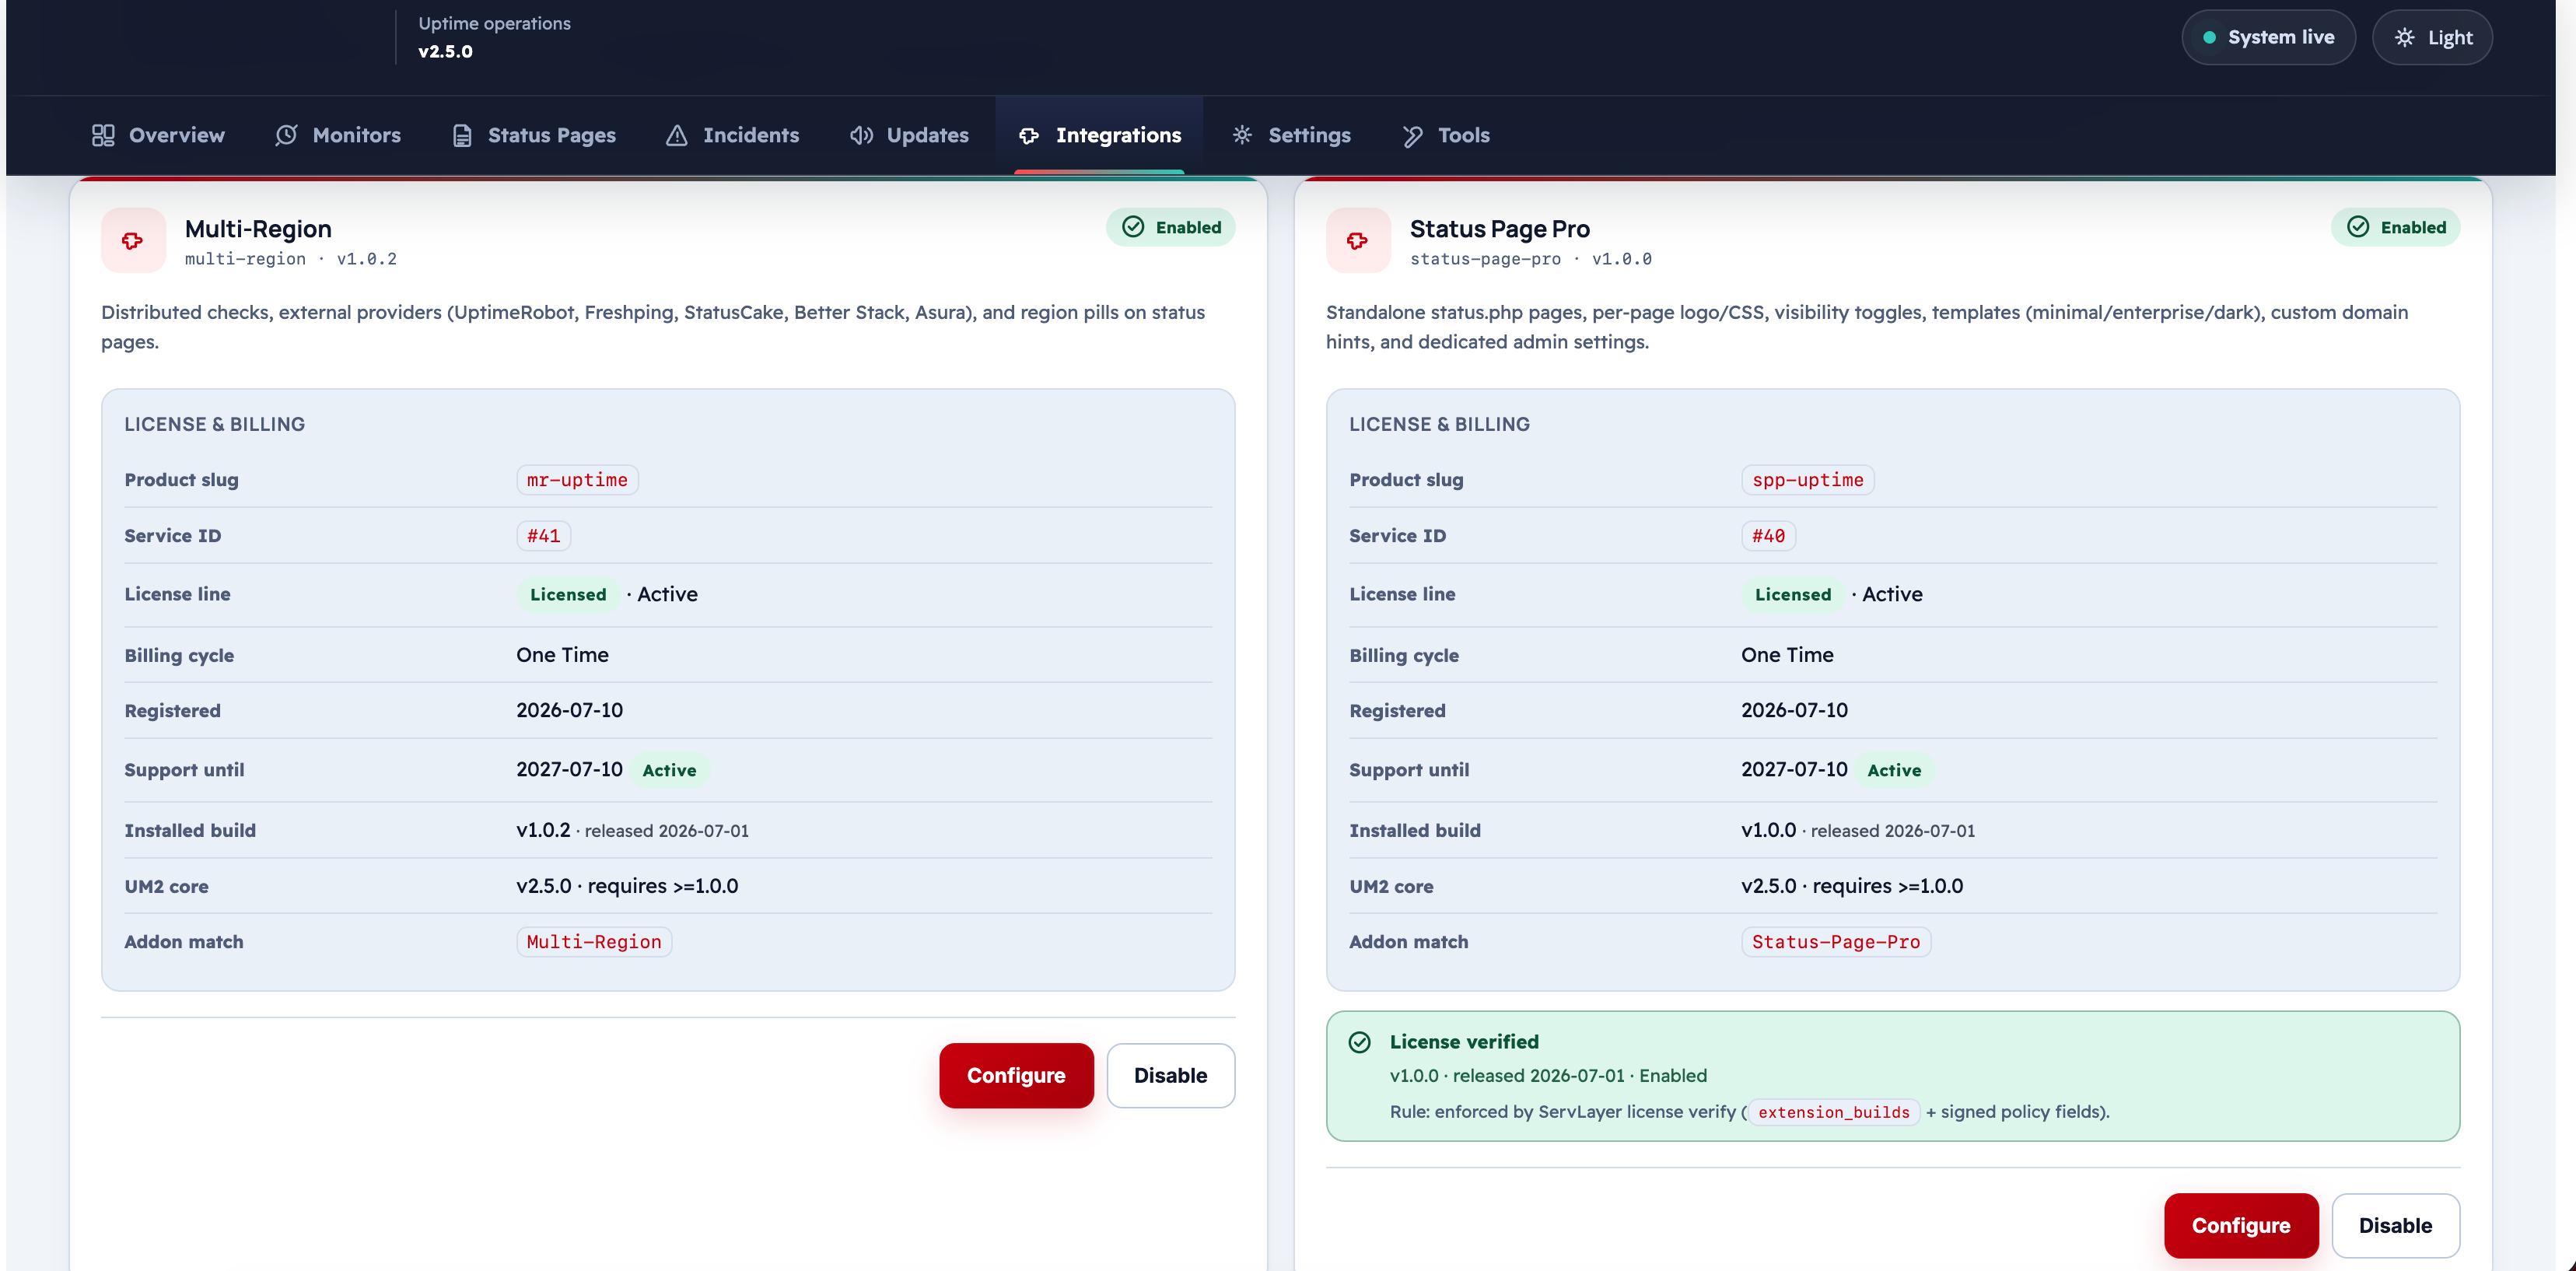
Multi-Region Extension
The Multi-Region extension enables distributed monitoring: checking each monitor from multiple geographic locations simultaneously.
How It Works
Without Multi-Region, all checks run from your main WHMCS server. With Multi-Region enabled, you deploy lightweight agent scripts on remote servers (or configure API connections to third-party monitoring providers), and those agents run the same checks from their location.
Results from all regions are collected and displayed on the status page, giving visitors a global view of service availability.
Supported Region Providers
| Provider | Type | Description |
|---|---|---|
local |
Native agent | Your main WHMCS server |
uptimerobot |
API | UptimeRobot API integration |
statuscake |
API | StatusCake API integration |
betterstack |
API | BetterStack API integration |
asura |
API | Asura uptime API integration |
| Custom agent | Script | PHP or Python agent deployed on any server |
Configuring API Providers
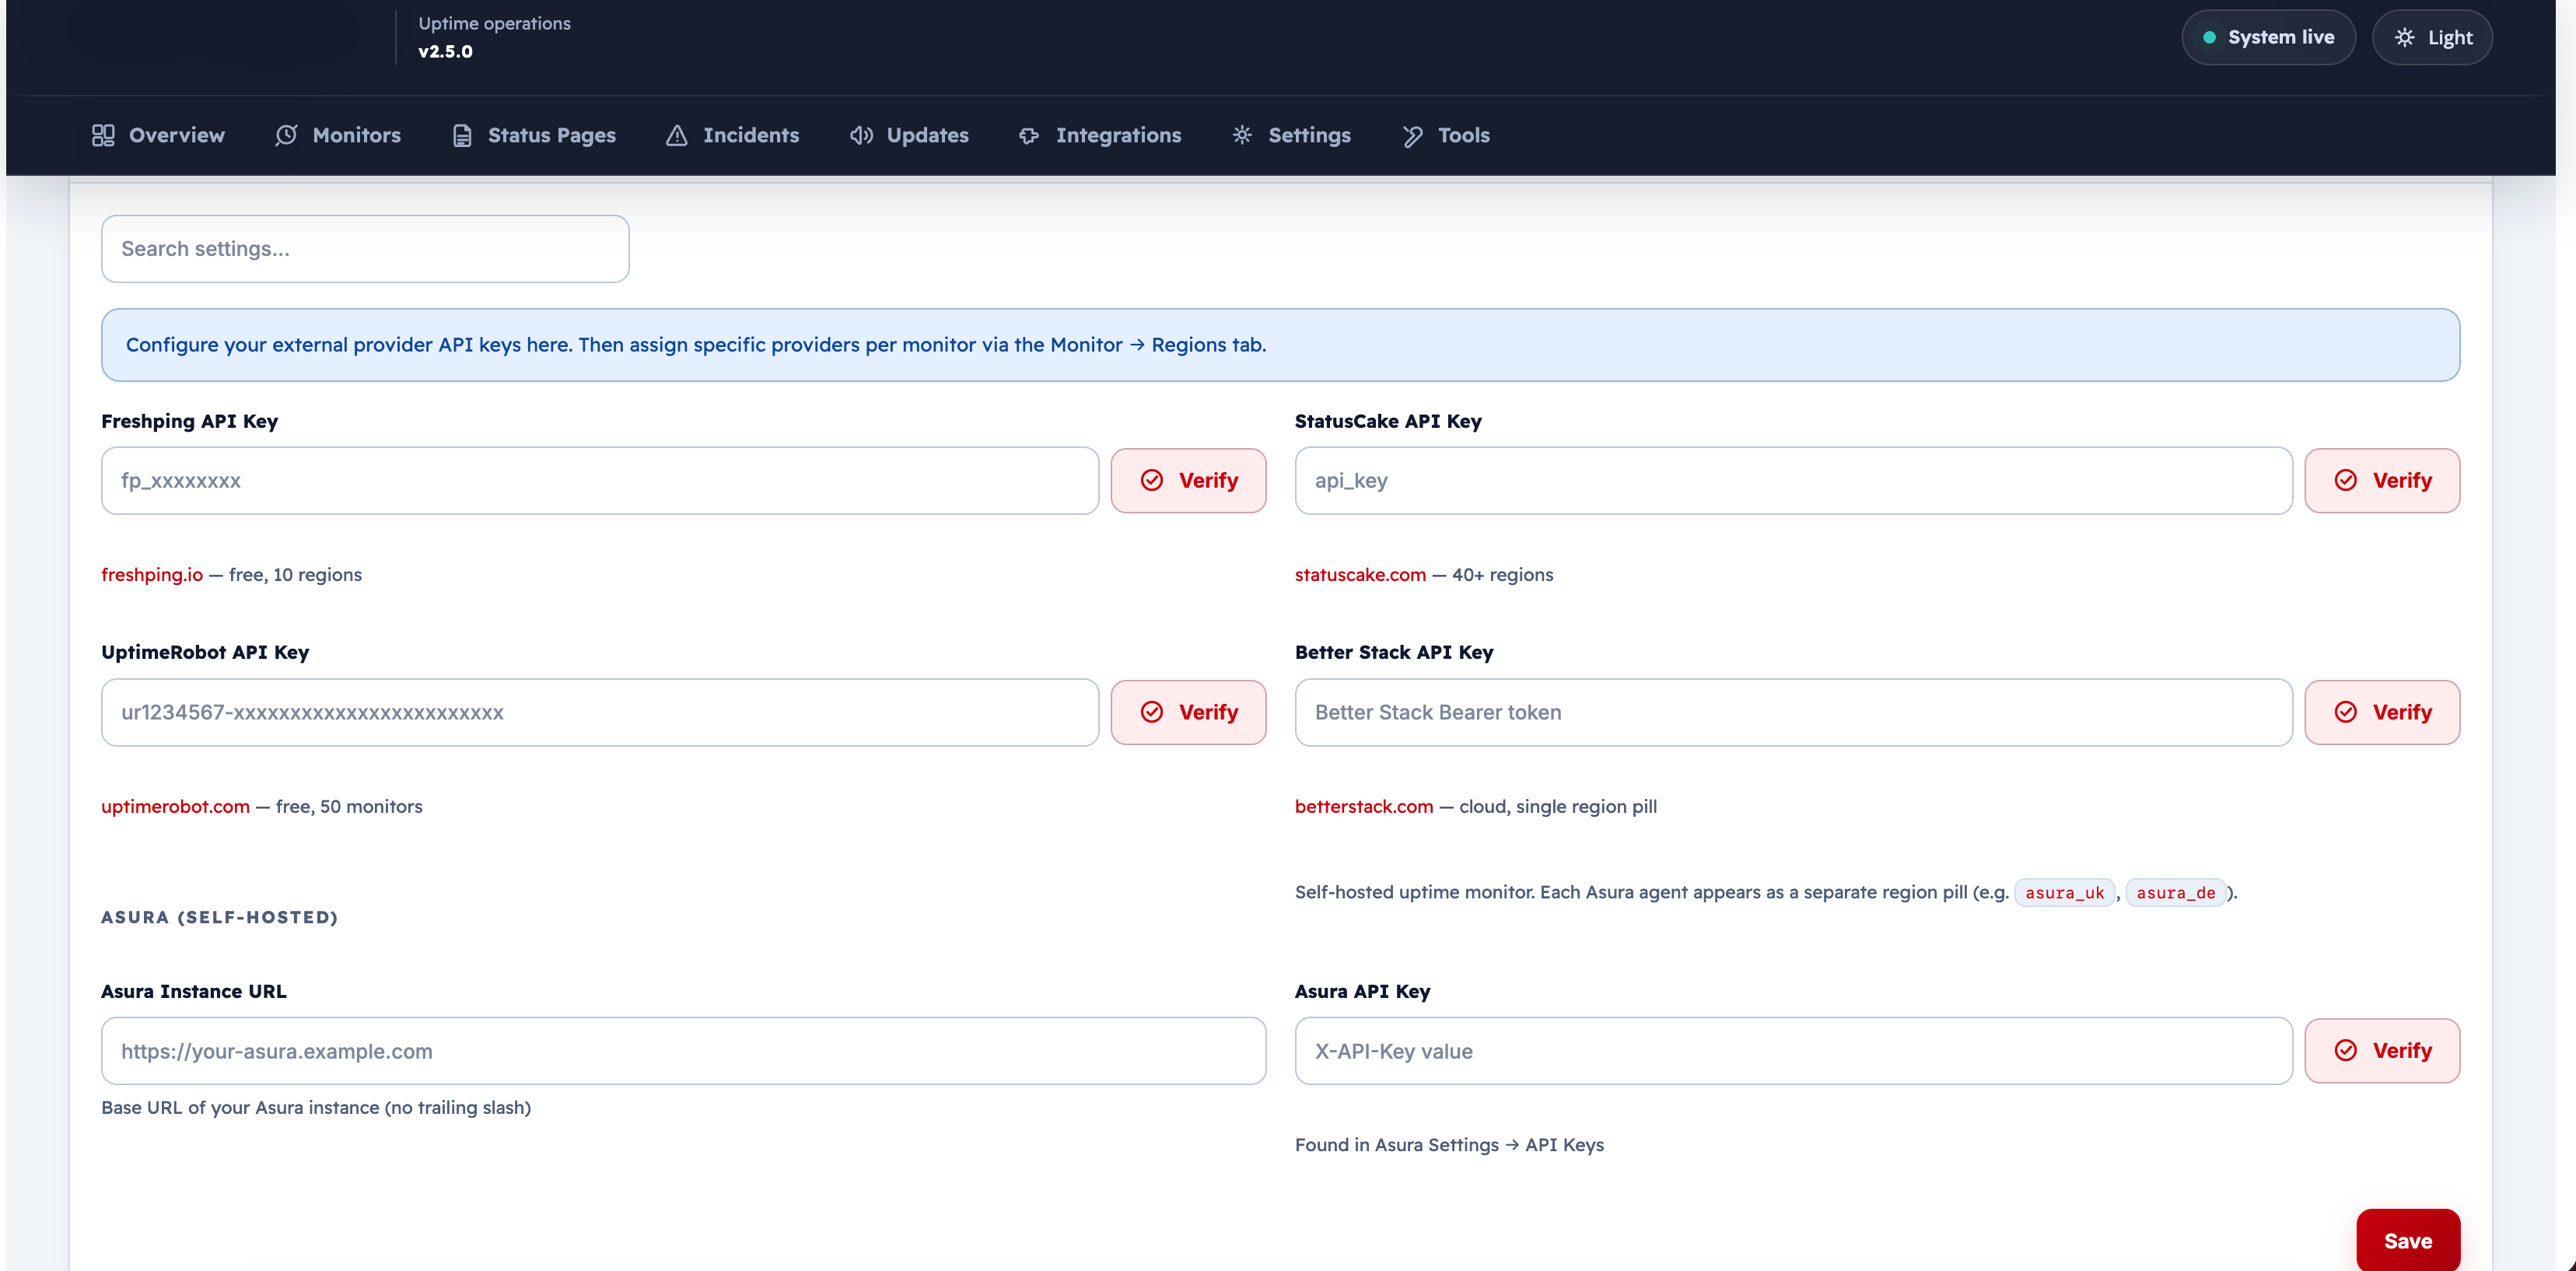
For each third-party provider you want to use:
- Open Integrations → Multi-Region → Configure.
- Enter the API key for each provider.
- Save. The extension will pull monitor results from those providers and display them alongside local results.
Per-Monitor Region Configuration
After enabling the extension, each monitor gains a Regions tab (see Monitors → Tab 5).
Per monitor you can:
- Enable or disable multi-region checking
- Select which regions to use for this monitor
- Choose the provider for each region
- Set custom display labels for each region
- Toggle whether agent results appear on the public status page
Public Display
When multi-region is enabled for a monitor and Show Agent Results is on, visitors see a region breakdown below the main monitor status:
Global Status: UP
├── Local (WHMCS)  ✓ 230ms
├── US East        ✓ 180ms
├── EU West        ✓ 310ms
└── Asia Pacific   ✓ 425ms
Status Page Pro Extension
The Status Page Pro extension adds advanced standalone and branding features to status pages.
Features Overview
| Feature | Description |
|---|---|
| Standalone status page | Access the status page at a root URL without WHMCS |
| Custom domain | Map your own domain (e.g. status.yourbrand.com) to a status page |
| Advanced branding | Remove ServLayer branding; full logo and CSS control |
| SEO-friendly URLs | Clean, readable URLs for your status pages |
Standalone Status Page
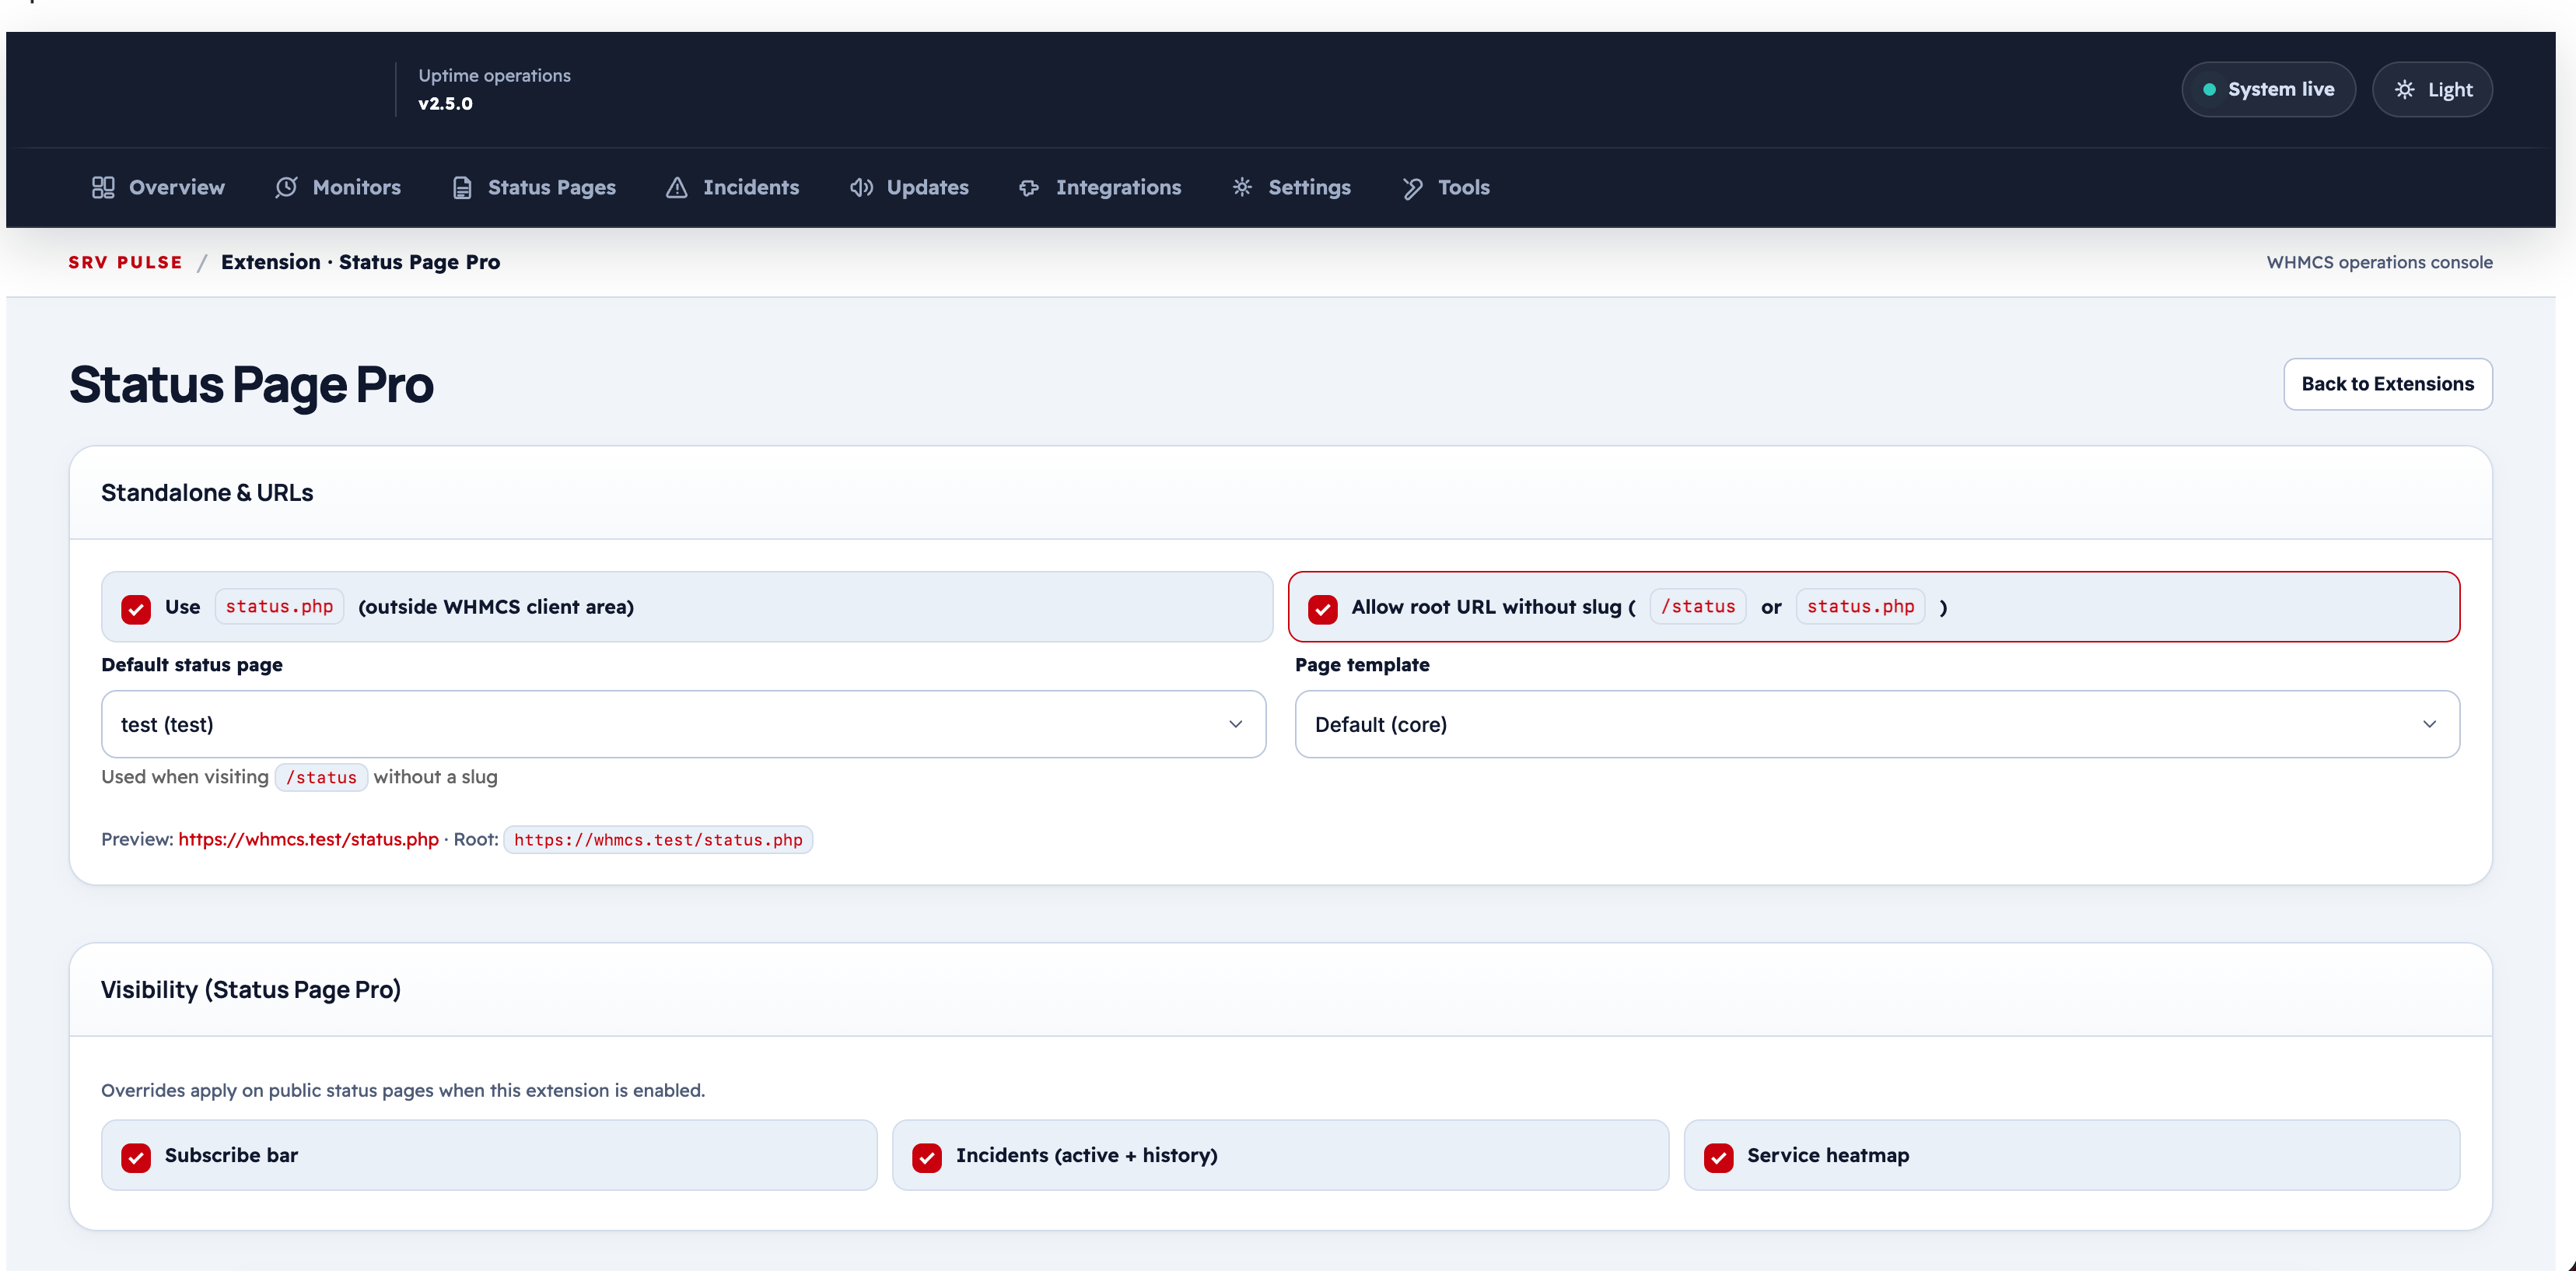
When status.php is uploaded to the WHMCS root directory, visitors can access the status page directly:
https://yourwhmcs.com/status.php
https://yourwhmcs.com/status.php?page={slug}
This page loads independently of the WHMCS client area — useful for customers who do not have WHMCS accounts.
Custom Domain & Branding
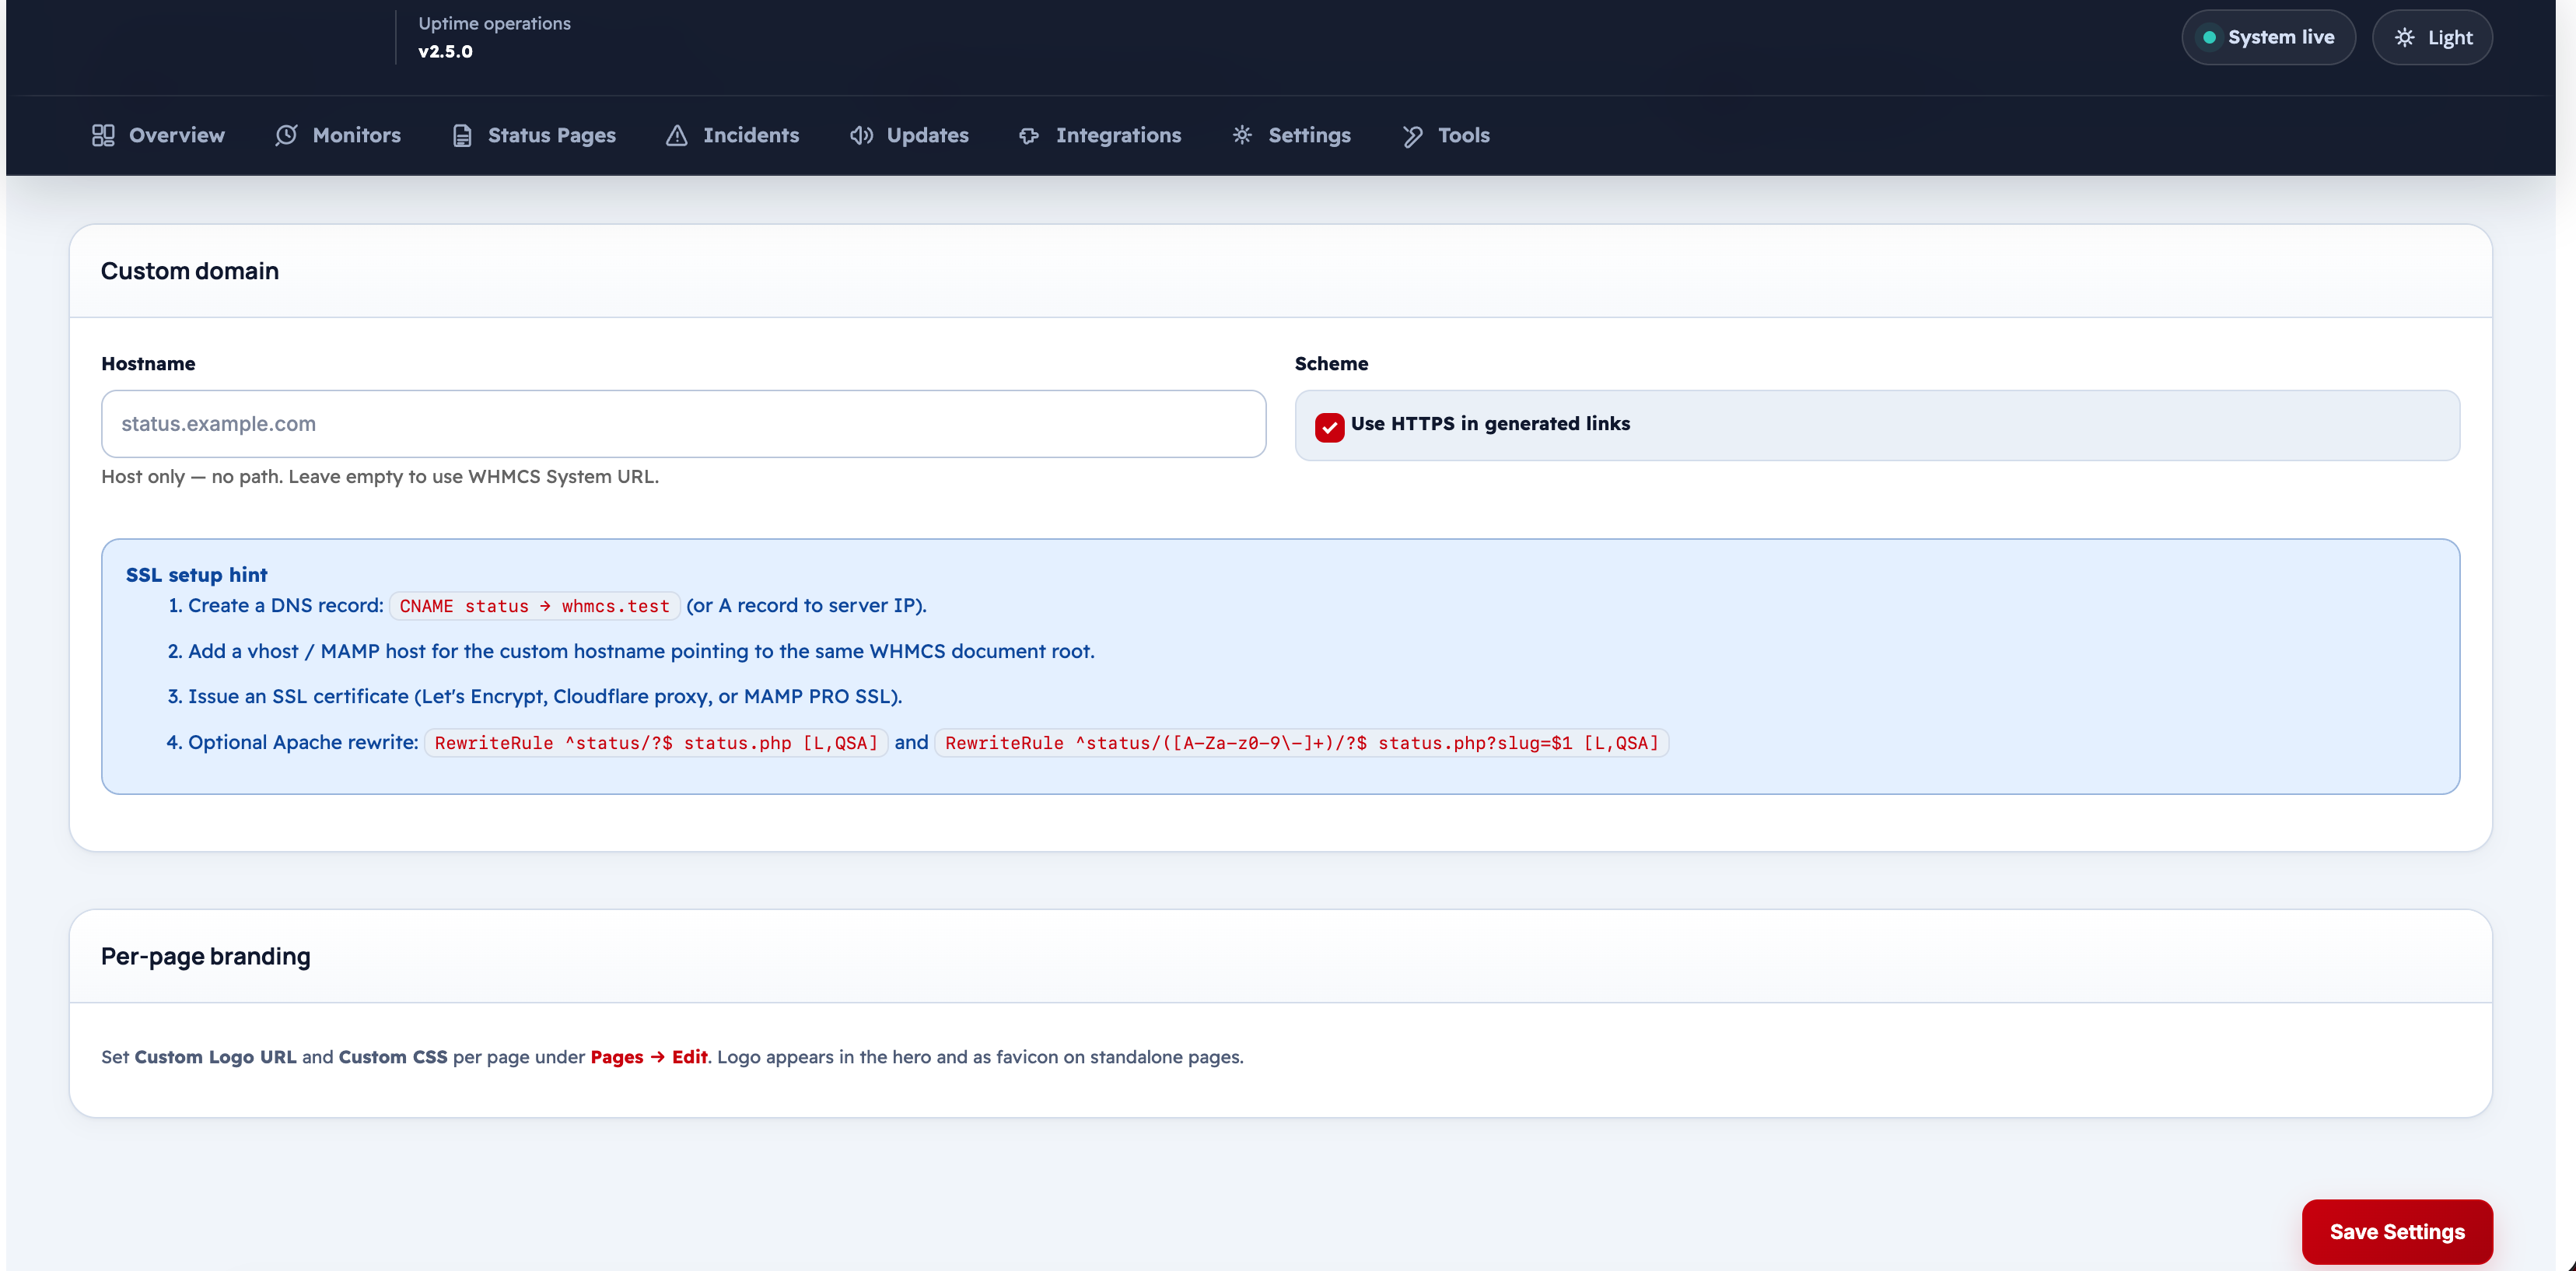
| Field | Description |
|---|---|
| Custom Domain | The domain to use for the standalone status page (e.g. status.yourbrand.com) |
| SSL Certificate | Must be active on the custom domain for HTTPS to work |
| Remove Branding | Hides the "Powered by ServLayer" footer |
| Custom Logo URL | Override the logo with a remotely hosted image |
| Favicon URL | Set a custom browser tab icon |
To use a custom domain:
- Point the domain's DNS to your WHMCS server (CNAME or A record).
- Install an SSL certificate for the domain.
- Configure the domain in Integrations → Status Page Pro → Configure.
Public Standalone Page (Visitor View)
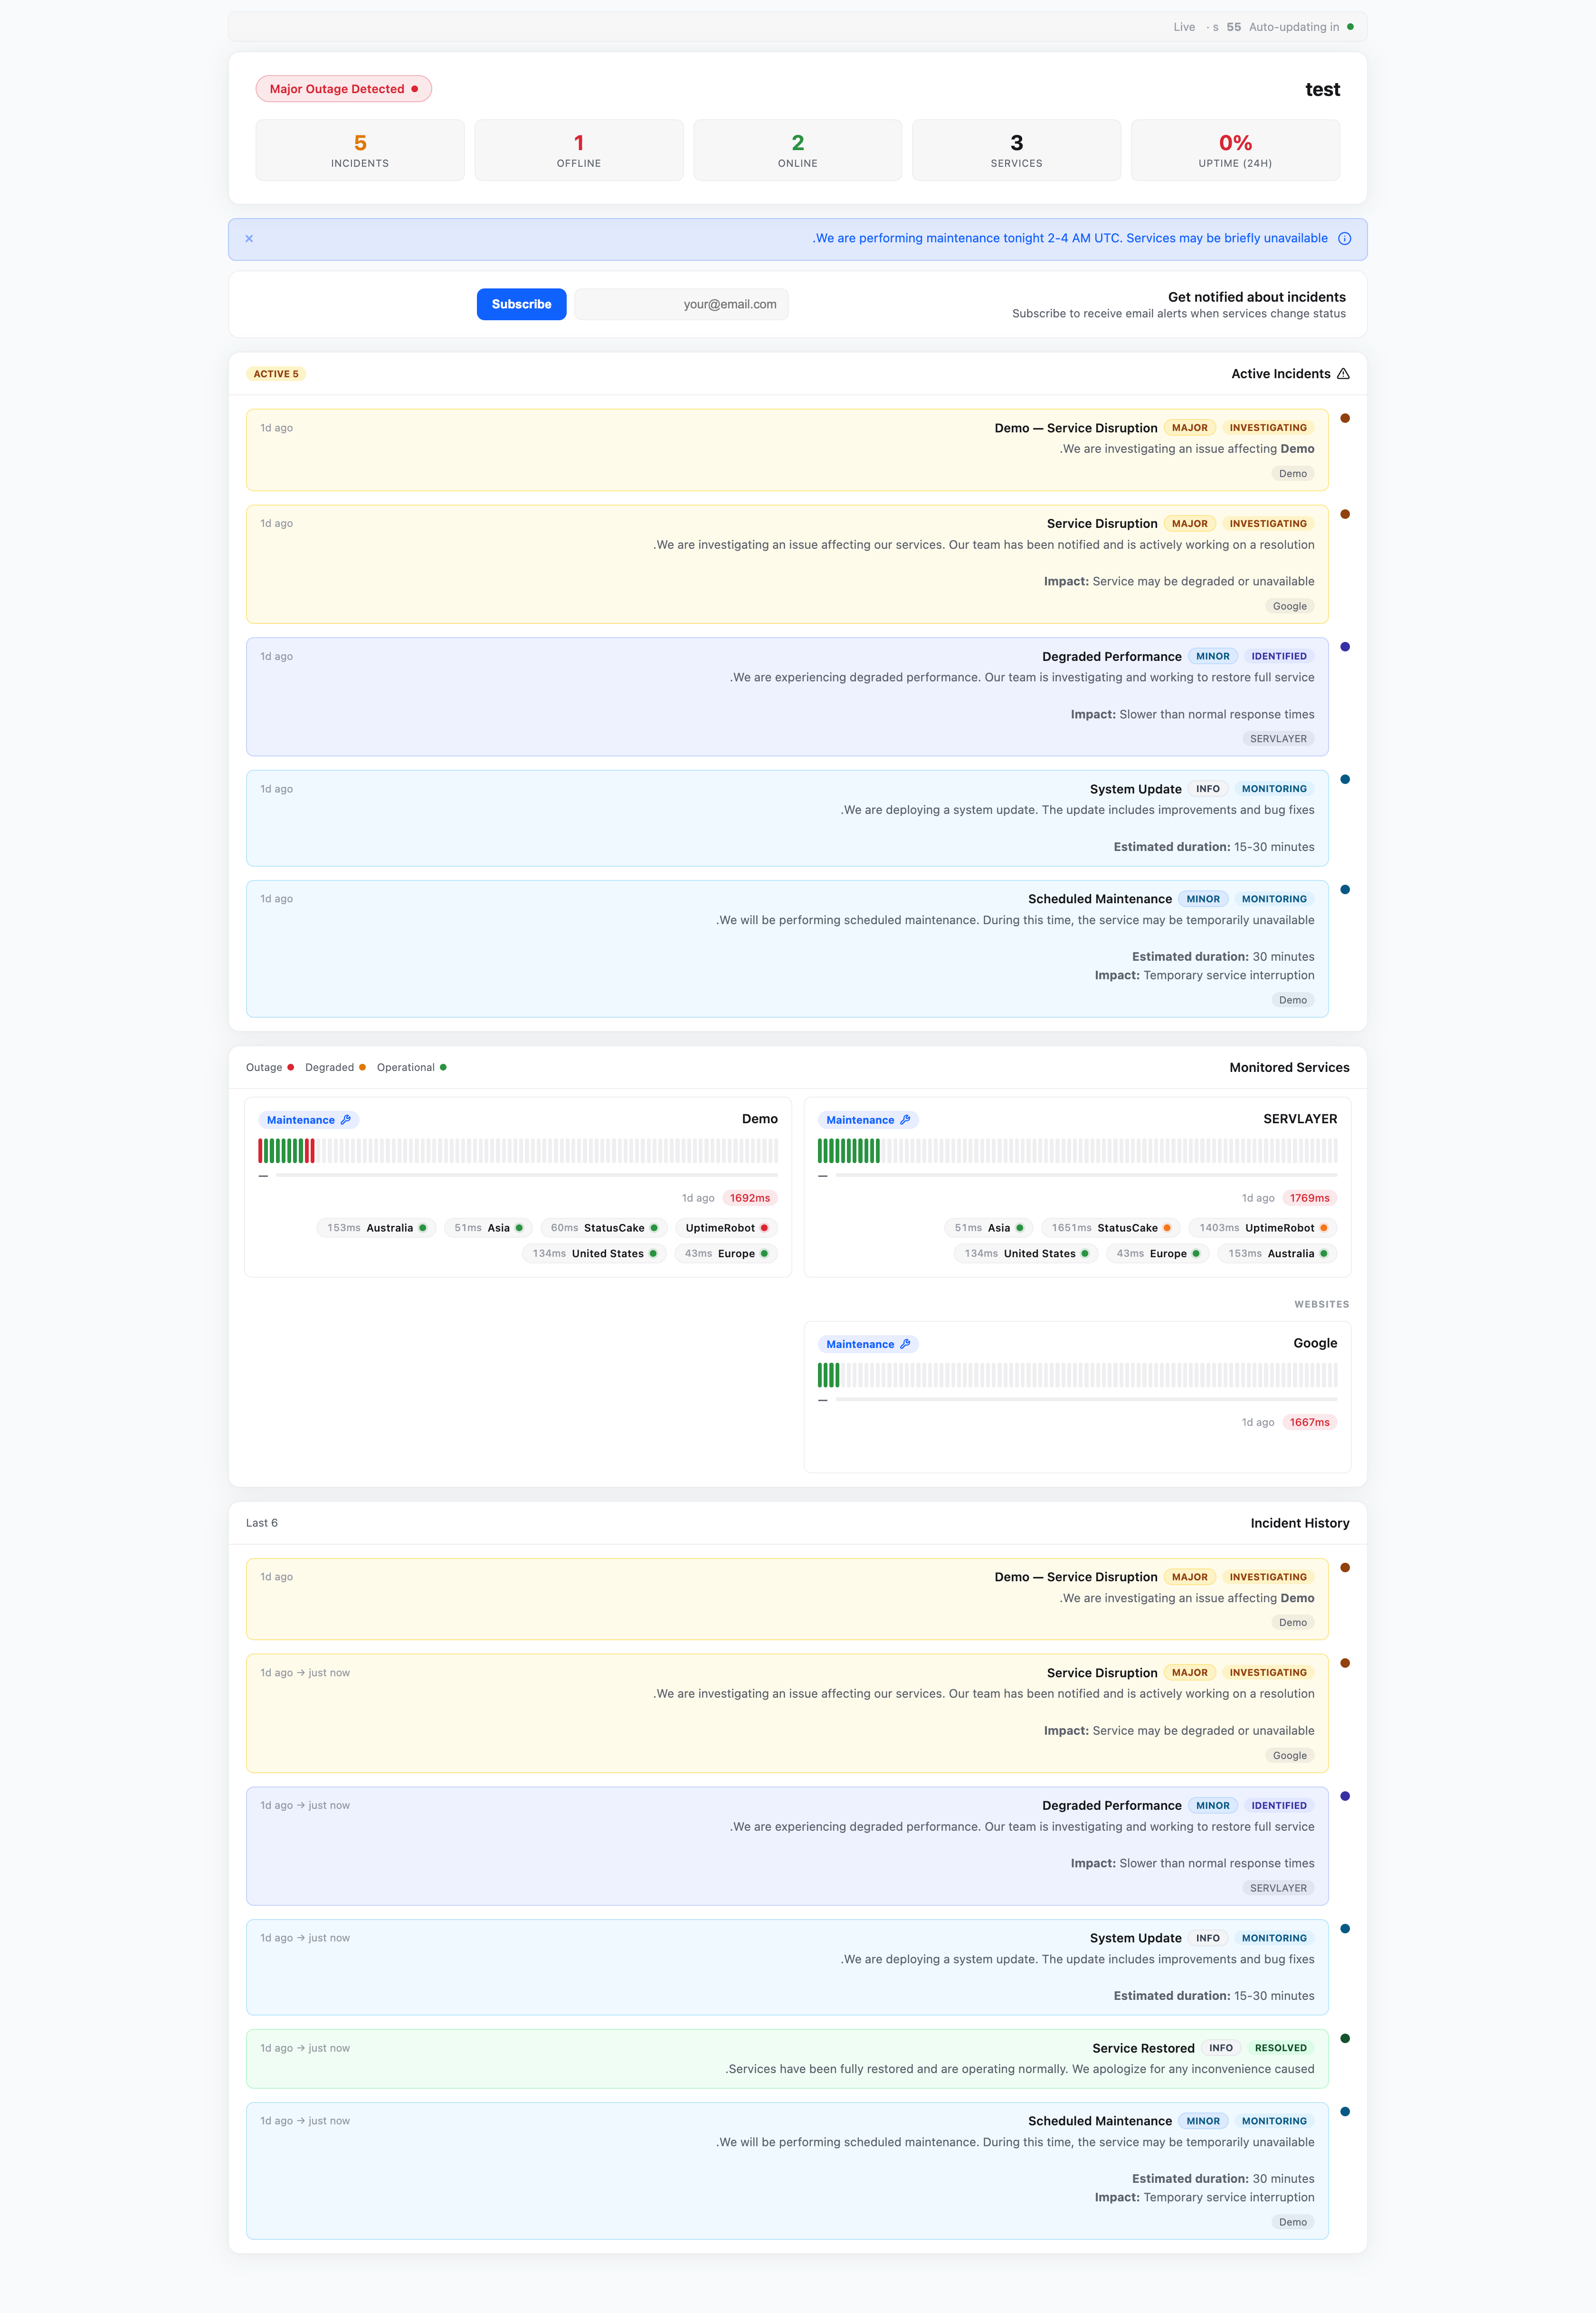
The standalone page shows the same content as the WHMCS client-area status page but with:
- No WHMCS navigation or header
- Full-page layout
- Optional custom domain and branding
Extension Licensing
Both extensions require an active extension license included in your ServLayer subscription:
- Go to Settings → License.
- The bottom panel shows extension license status.
- If not licensed, contact ServLayer to add the extension to your plan.
When the extension license is invalid:
- The extension configuration UI is still accessible
- No extension features activate until a valid license is detected on the next license check
Caution
Deactivating the main UptimeMonitor2 addon also deactivates all extensions. Extension data (region configs, standalone settings) is preserved.