
Installation
Installation & Activation (1.2.3)
This page walks through installing the module files, activating the addon in WHMCS, and entering your license key. It is intended for the administrator performing the initial setup.
Step 1 — Upload the module
- Extract the distributed package.
- Upload its contents into your WHMCS installation's
modules/addons/directory, so that the module folder ends up atmodules/addons/srv_aichatbot/. - Ensure the web server user has read access to all module files, and write access to the module's
storage/folder (used for logs, uploads, and cached data).
Step 2 — Activate the addon module
- In the WHMCS admin area, go to Setup → Addon Modules.
- Locate SRV AI Chatbot in the list and click Activate.
- Assign the addon's admin permissions to the appropriate administrator roles, if prompted.
Step 3 — Open the module and enter your license key
- Navigate to Addons → AI Copilot Suite.
- On first run, you land on the License tab.
- Enter your License Key (format
SRV-AI-XXXXXXXXXXXXXXXX) in the field provided and save.
| Friendly name | System name | Type | Default |
|---|---|---|---|
| License Key | license_key |
text | — |
Warning
Keep your license key private. It is tied to your ServLayer account and billing.
Understanding the License tab
Once activated, the License tab shows License & Version information across two sub-views:
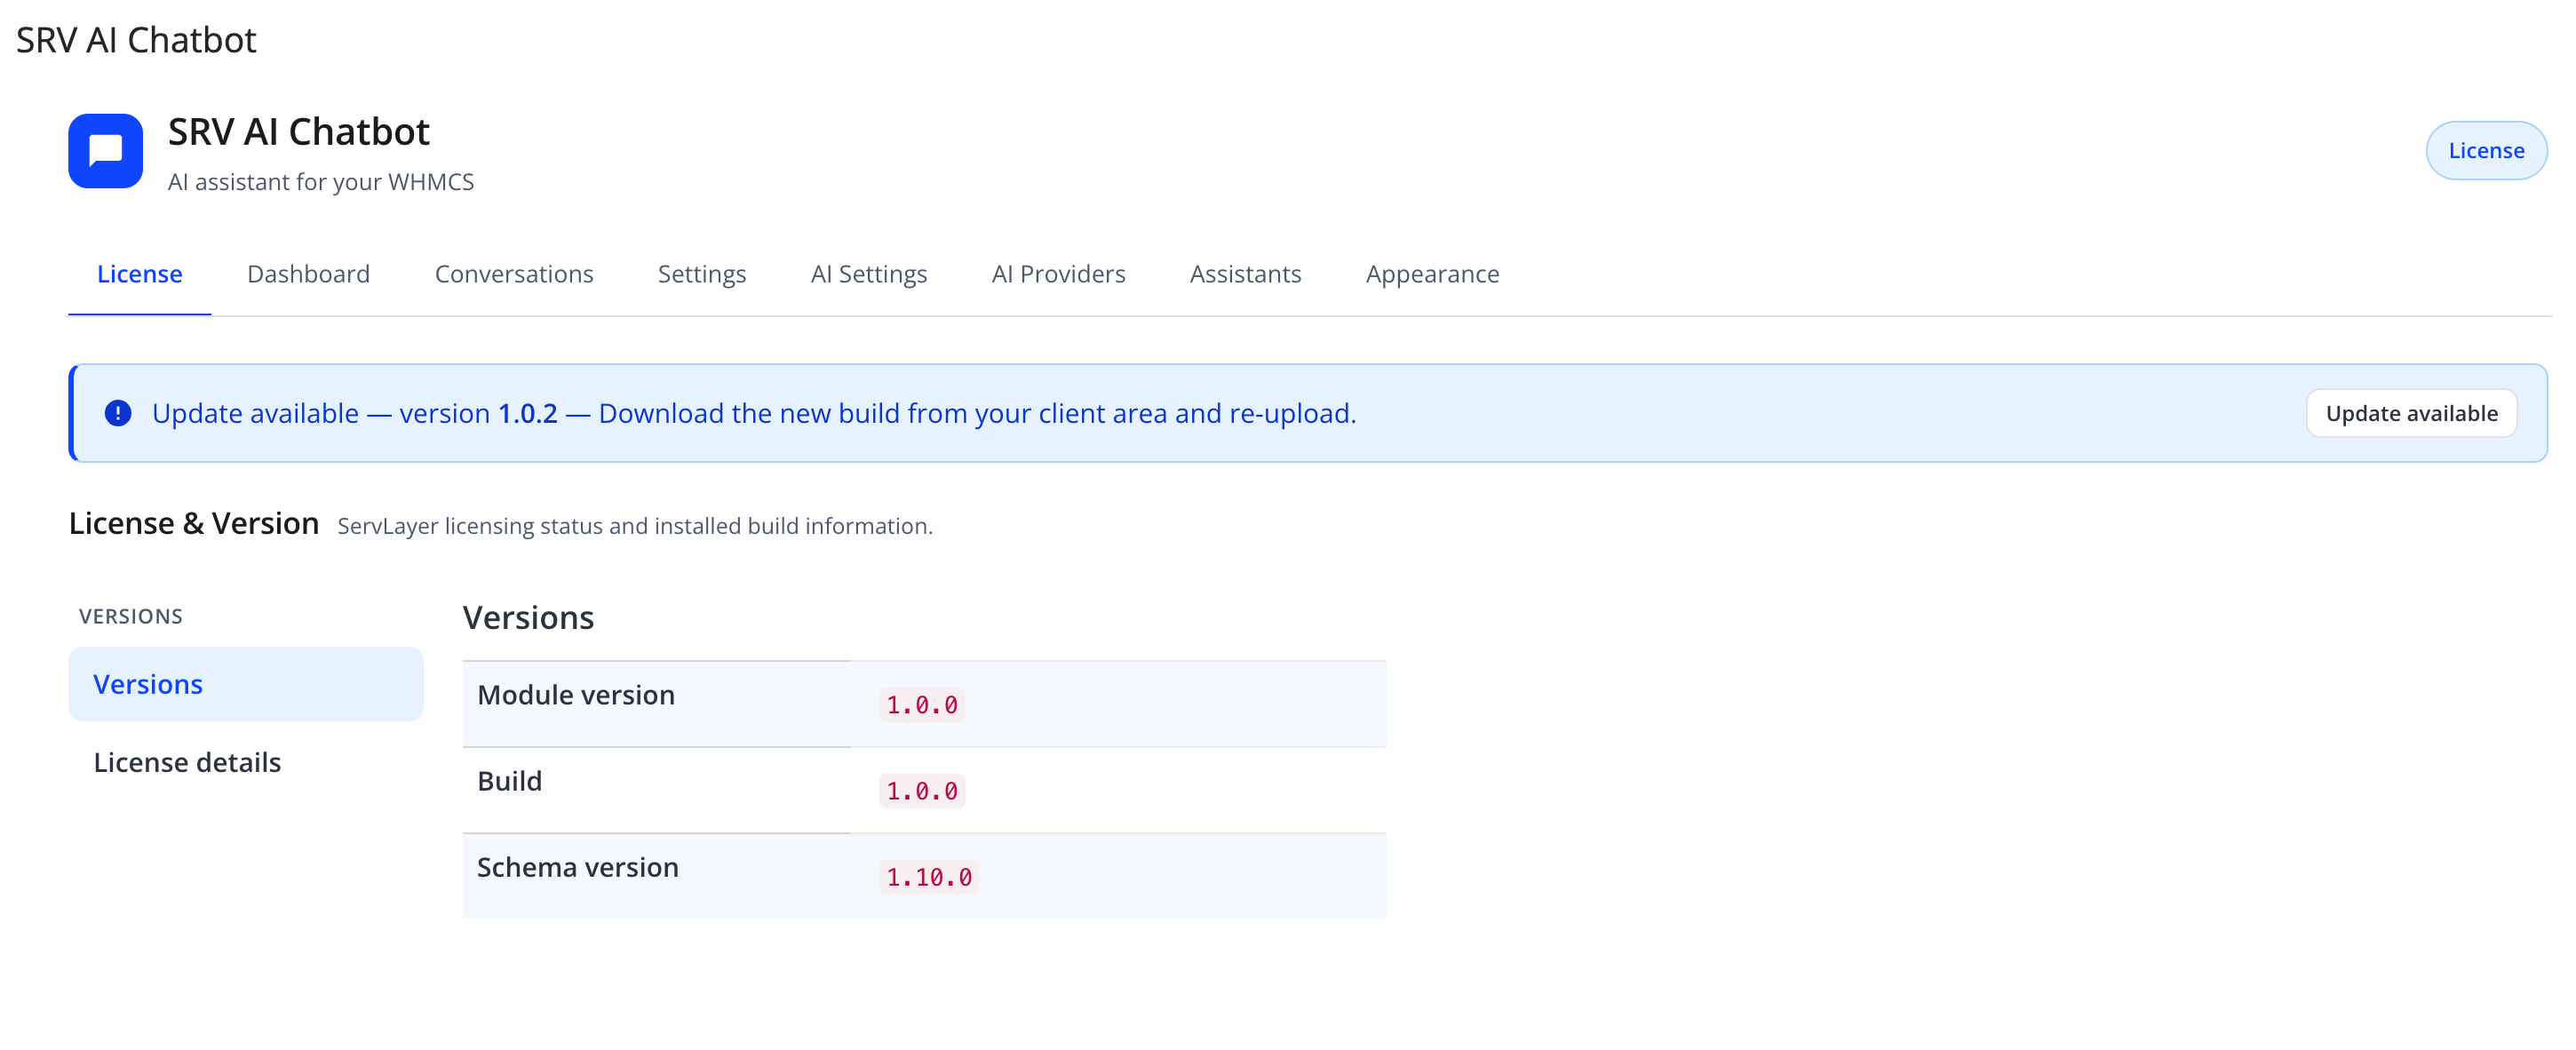
Versions — read-only build information:
| Field | Meaning |
|---|---|
| Module version | The installed addon version (e.g. 1.2.3) |
| Build | The installed build number |
| Schema version | The installed database schema version |
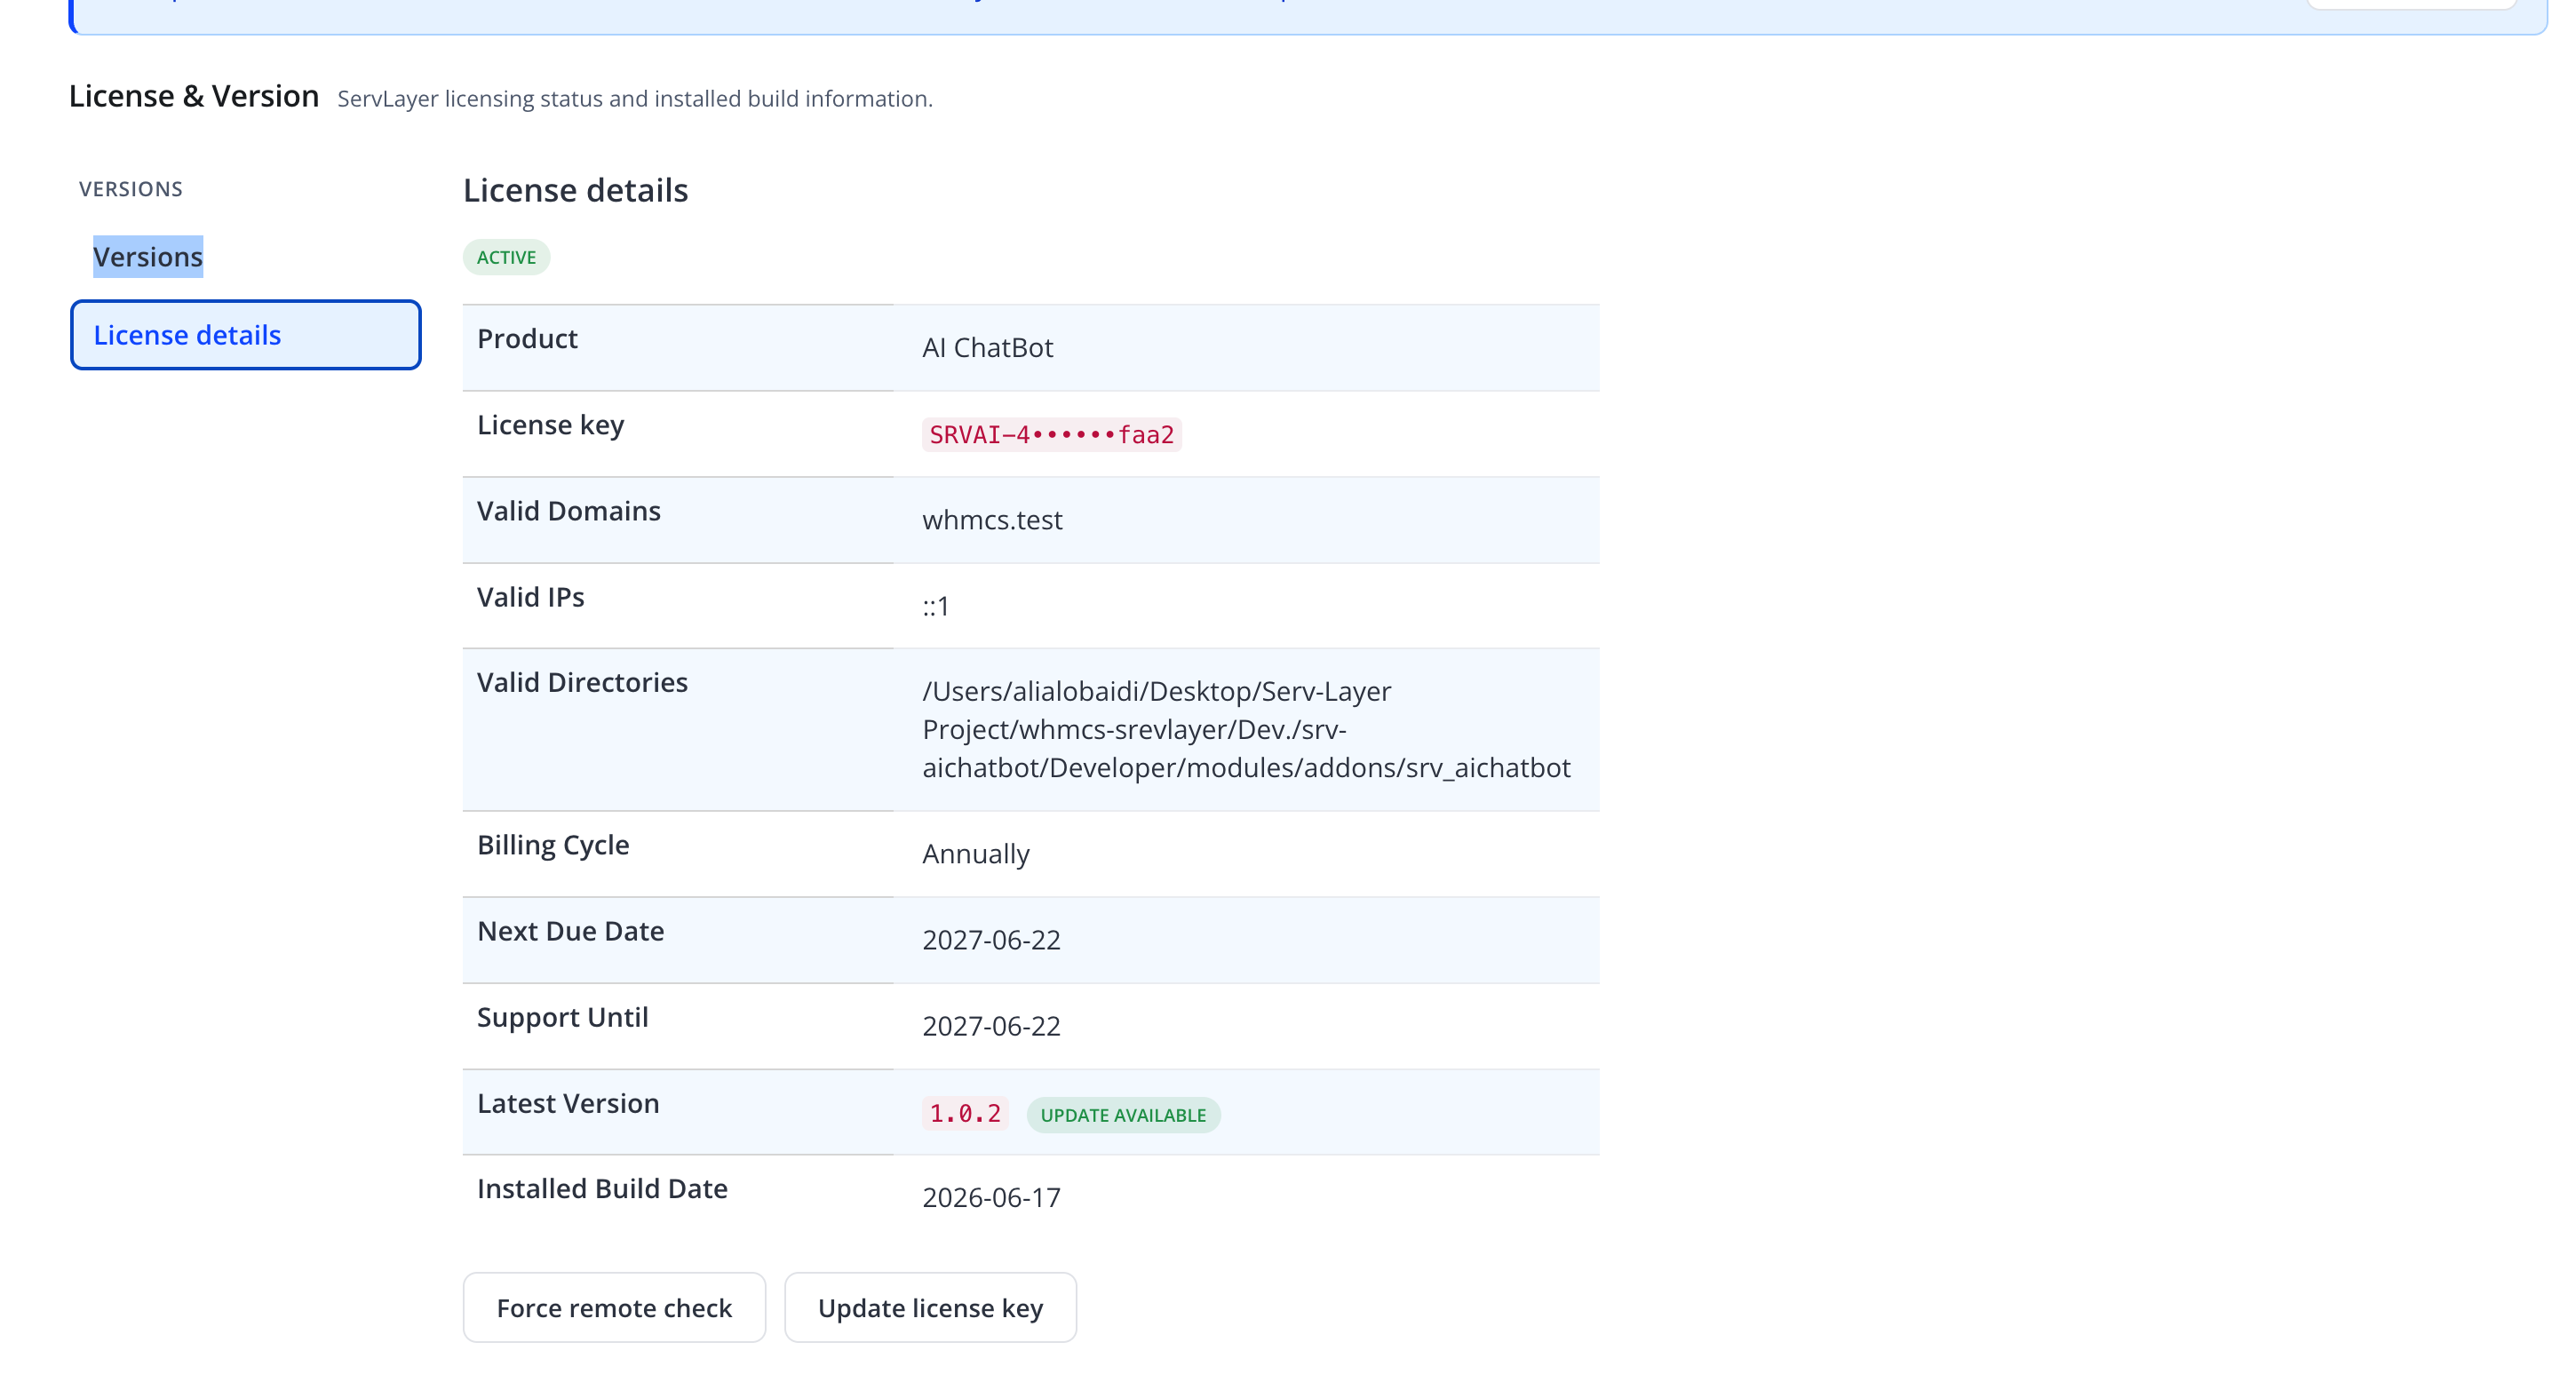
License details — license scope and entitlement:
| Field | Meaning |
|---|---|
| Status badge | ACTIVE (or invalid/missing) |
| Product | The licensed product name |
| License key | Shown partially masked |
| Valid Domains | Domain(s) this license is bound to |
| Valid IPs | IP address(es) this license is bound to |
| Valid Directories | Filesystem path(s) this license is bound to |
| Billing Cycle | e.g. Annually |
| Next Due Date | Next renewal date |
| Support Until | Date your update/support entitlement ends |
| Latest Version | Latest published version, with an UPDATE AVAILABLE badge when newer than installed |
| Installed Build Date | Date the currently installed build was published |
| Action | Effect |
|---|---|
| Force remote check | Re-validates the license against the license server immediately, bypassing the normal cache interval |
| Update license key | Reveals the field again to replace an existing key |
If a newer version has been published, a banner appears at the top of the License tab:
Note
"Update available — version X.Y.Z — Download the new build from your client area and re-upload." This is informational only — SRV AI Chatbot does not auto-update itself; download the new package from your ServLayer client area and repeat the upload steps above.
Note
If your support/update entitlement has lapsed, the module shows a restricted screen with renewal links instead of the full admin panel, until the license is renewed.
Step 4 — Enable the module
Once the license shows ACTIVE, go to Addons → AI Copilot Suite → Settings → General and turn on Enable chatbot — the master switch that allows the client-area widget to appear. See General Settings.
Next step
Continue to the Post-Install Checklist.