
Guide
ISO Images
This page imports Proxmox ISO volumes and marks them usable as custom VPS media. It is written for the operator selling CD install instead of a cloned template.
Menu: Addons → Proxmox Suite → Resource → Templates Center → ISO Images
Purpose
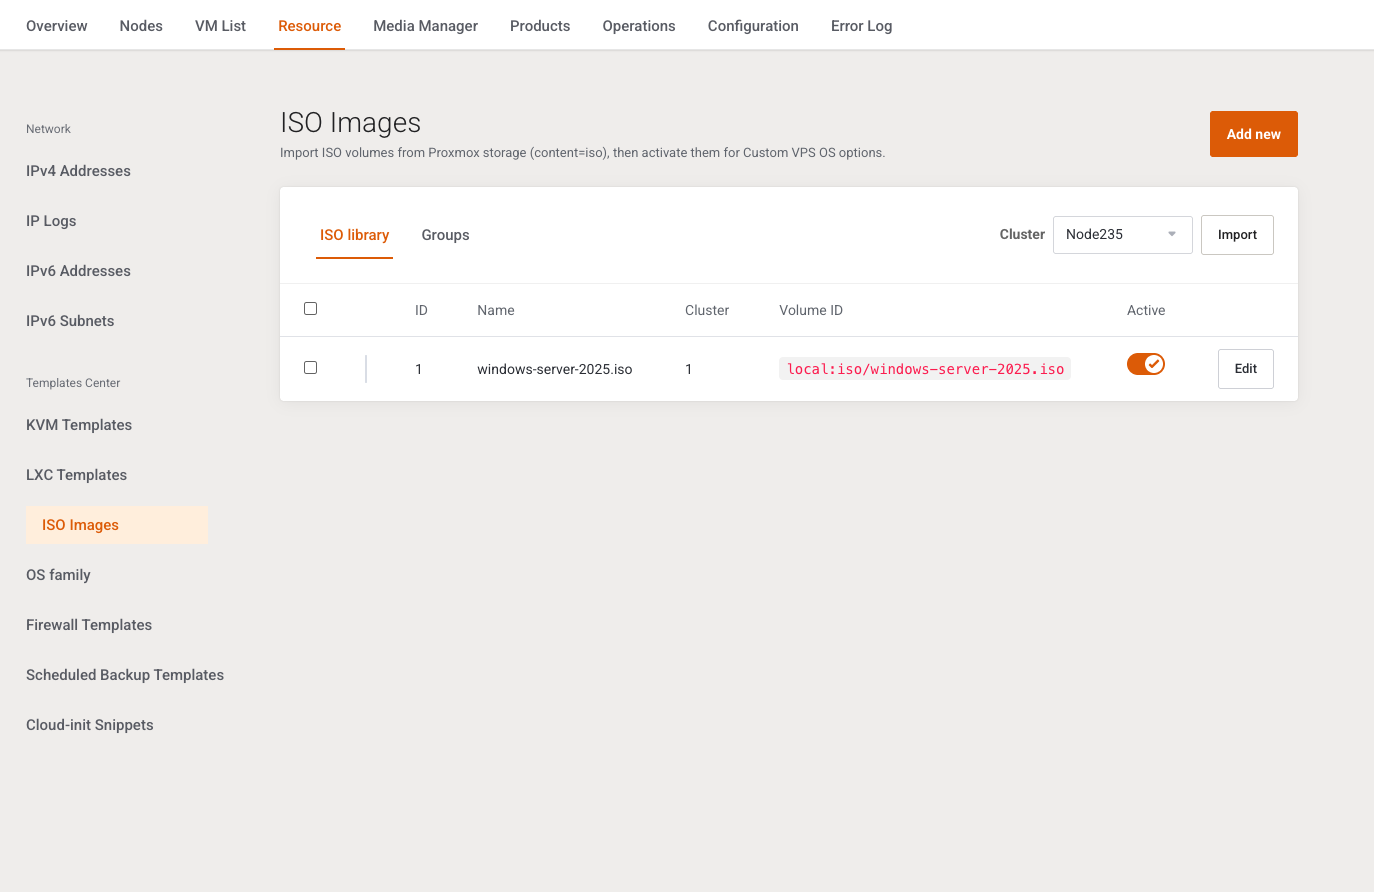
Intro: Import ISO volumes from Proxmox storage (content=iso), then activate them for Custom VPS OS options.
Tabs: ISO library, Groups.
Library
Add new is on the library tab. Cluster plus Import scans online nodes for storages that contain iso and skips a volid already registered on that cluster. Success: Imported %d ISOs (%d already registered). No active cluster: the import control is disabled with Add an active cluster first.
Columns: selection, family icon, ID, Name, Cluster (numeric id), Volume ID, Active (saves immediately), Edit. Empty: No ISOs registered yet. Use Import or Add new below.
Checked rows: Enable, Disable, Delete (confirms Delete the selected items?). Nothing checked: Select at least one row first.
Add / Edit
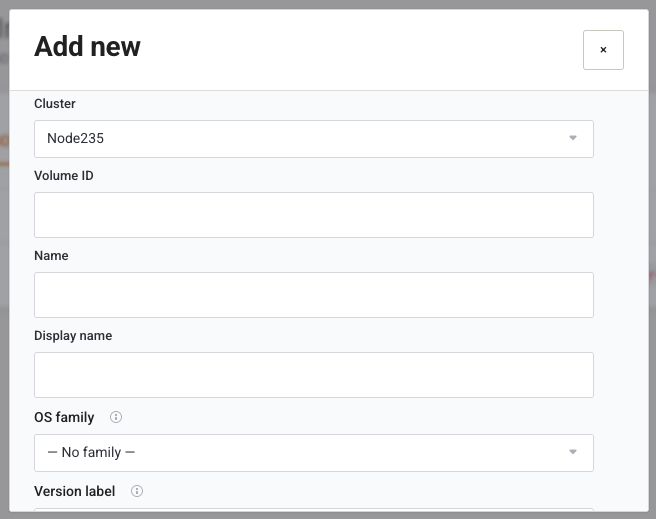
| Field | Type | What it does |
|---|---|---|
| Cluster | Select, required | Active clusters. |
| Volume ID | Text, required | Proxmox volid. |
| Name | Text | Falls back to the volid when empty. The server still requires a non-empty name after that fallback. |
| Display name | Text | Label shown instead of the raw volid when set. |
| OS family | Select | Active families, or none. OS family not found. when the id is invalid. |
| Version label | Text | Version under the family card. |
| OS type | Text | Free text stored on the ISO row. |
| VirtIO ISO (optional) | Text | Companion VirtIO volume id. |
| Active | Switch | Off hides the ISO from selection lists. |
Save error when cluster, volid, or name is missing: Cluster, volume id, and name are required.
Groups
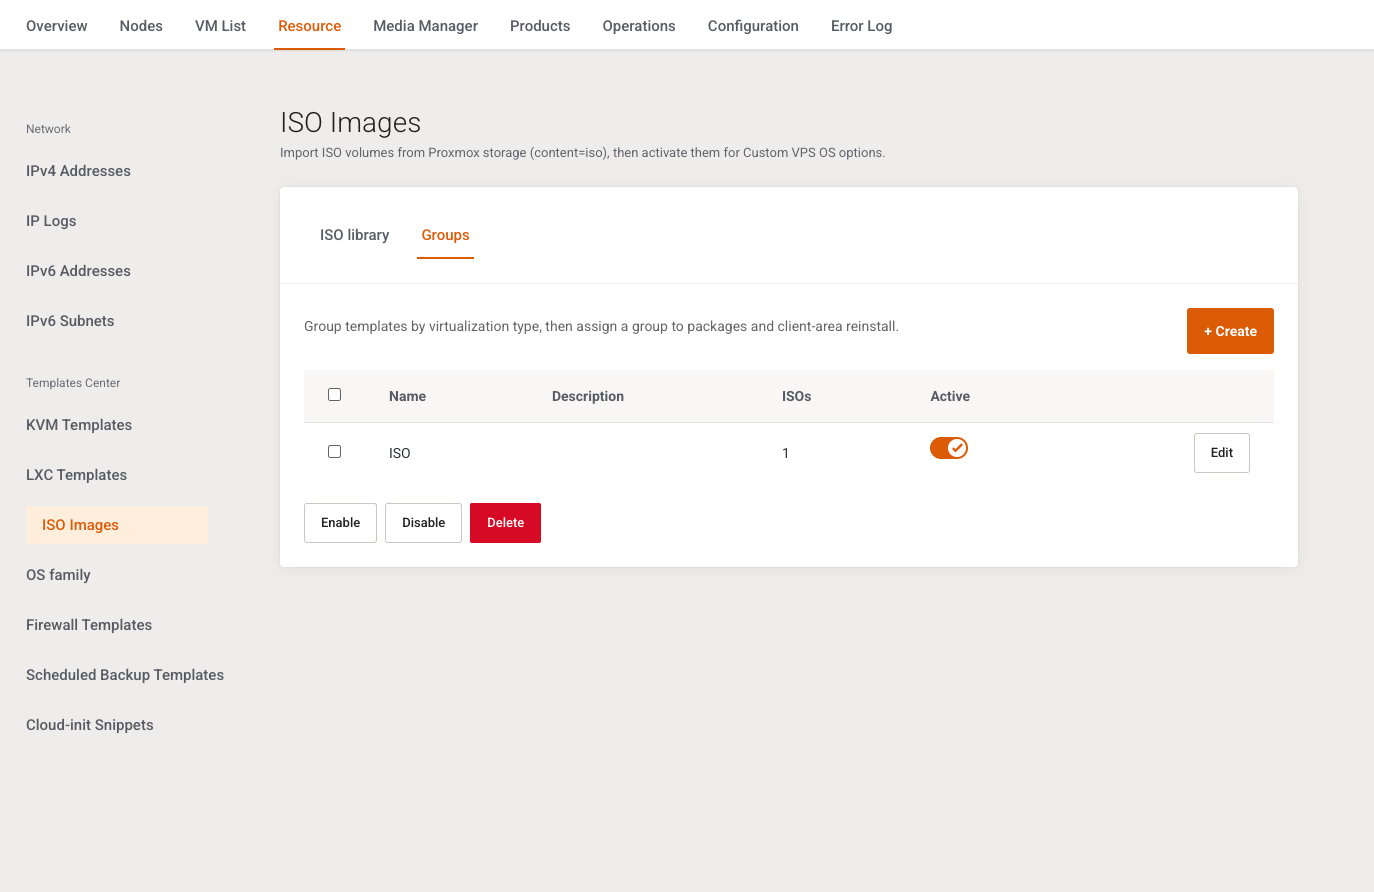
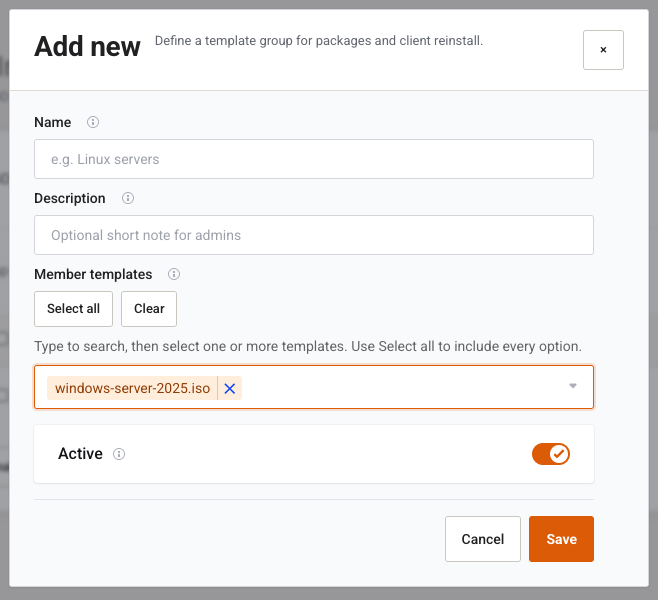
Same group form as templates: Name, Description, members, Active. Members are ISOs. The member column label is ISOs. Inactive members are marked (inactive).
Example
Import the cluster, Edit the Debian netinst row, set OS family and Version label, leave Active on. On the VM Plan OS tab choose Use CD/DVD disc image file (iso) and this volume.
Next step
OS family so several versions share one reinstall card.